JOE'S DO-IT-YOURSELF POWERPOINT:
HOW TO BUILD YOUR OWN RAISED GARDEN BED.
OUR EARLY EFFOERTS 2015 TO 2021
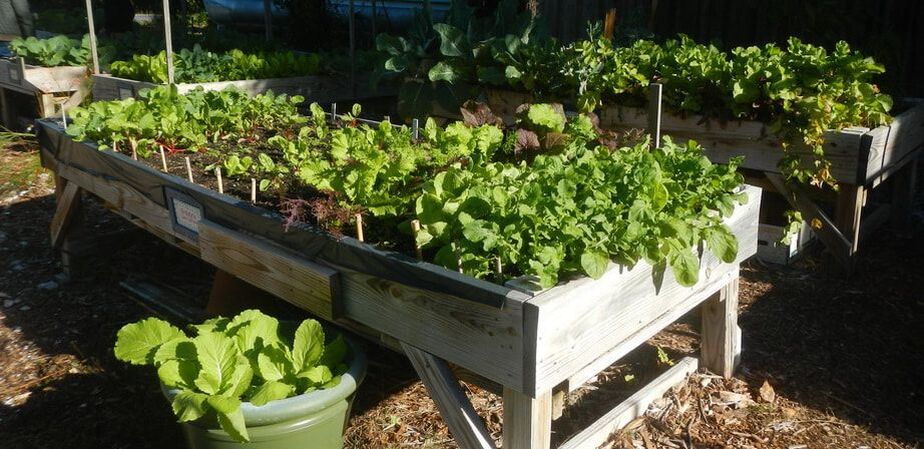
After clearing the Cedar Key Community Garden acreage from weeds, vines, fallen trees, and debris, the task of making garden bed building became the focus.
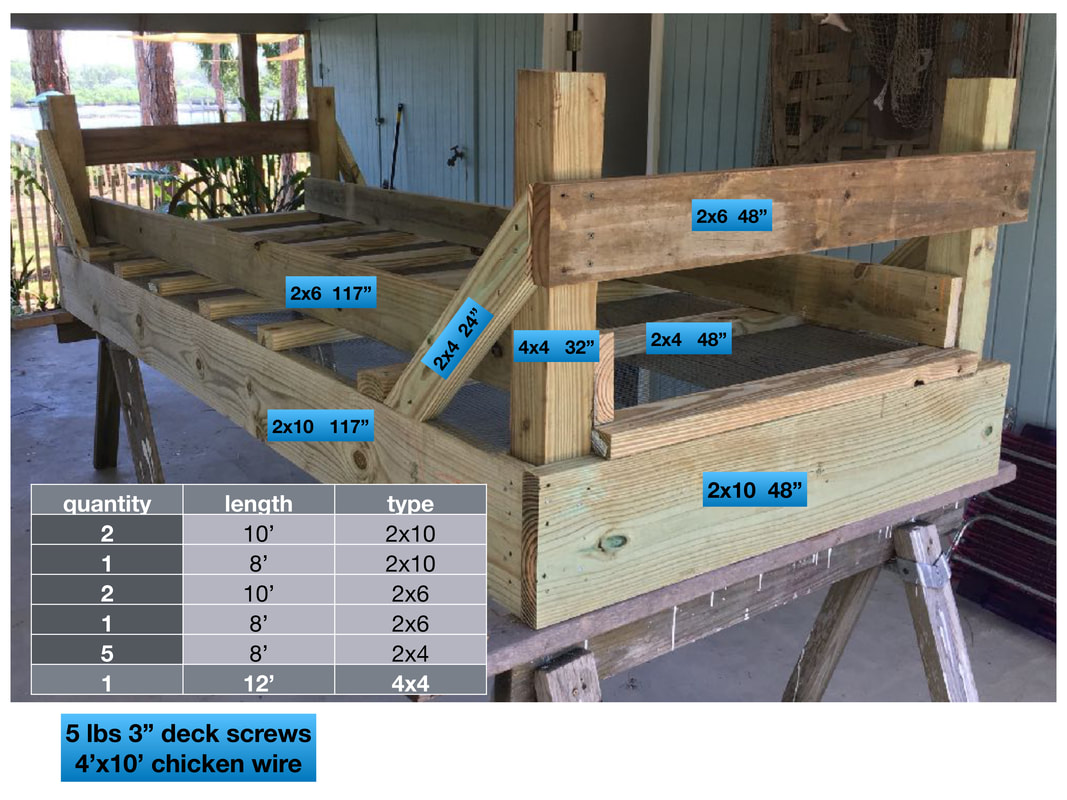
In November and December of 2015, Community Garden Leader Tom Deverin and Joe Hand began designing the best possible bed style and size for the area. They decided upon four-by-ten-foot beds with four-foot aisles. The site plan bed placement layout came from Mandy Offerle. Tom and Joe ordered the materials necessary.
In December 2015 and January 2016, gardeners gathered to build the initial 24 beds. What follows on this website is Joe’s “How to Build a Garden Bed” PowerPoint.
OUR RECENT CHANGES... 2021 ONWARD...
WE'VE LEARNED A FEW THINGS
WE’VE LEARNED A FEW BED-BUILDING LESSONS
After using our raised beds for 6 years now, we’ve learned some lessons and plan to make some changes that will result in stronger and longer lasting beds.
The changes assure that water is not in contact with the 2x10 band boards that form the bed perimeter. It seems that continual moisture on the pressure-treated 2x10's will make the wood rot over time.
The problem started when we did not allow enough plastic liner to hang over the top edge of the bed. When the soil settled, the plastic was pulled into the bed allowing the soil to be in contact with the 2x10's.
So now we do a few things differently.
ADDITIONAL PLASTIC:
First, leave plenty of plastic hanging over the side of the bed, that can be trimmed later once the soil is settled.
Next, we now put another heavier gauge plastic over the 2x10's. The plastic extends onto the bottom of the bed by about 6", then it goes over the top of the 2x10 board, once again leaving extra so that the plastic will not get pulled into the bed.
Once settled, you can then trim off the extra plastic. We have been attaching a 1" x 11/2" wood to the top of the 2 x 10 to protect the plastic from the sun which over time will break down the plastic.
HOLE PUNCHING:
The other adjustment that we made is to punch holes in the plastic on the bottom of the bed only in the center of the bed. The hardware cloth will have a belly in it between the 2" x 4" cross members: this is where you put holes in the plastic so that water drains from the center of the bed not along the edges.
LEVELING, PAVERS:
We also placed the legs of the bed onto concrete pavers so the bottom of the 4" x 4" legs do not deteriorate. We now make sure that the beds are level so that the water drains from the center of the bed.
These changes will ensure that your bed will last for many years.

